Drew Terril
Staff member
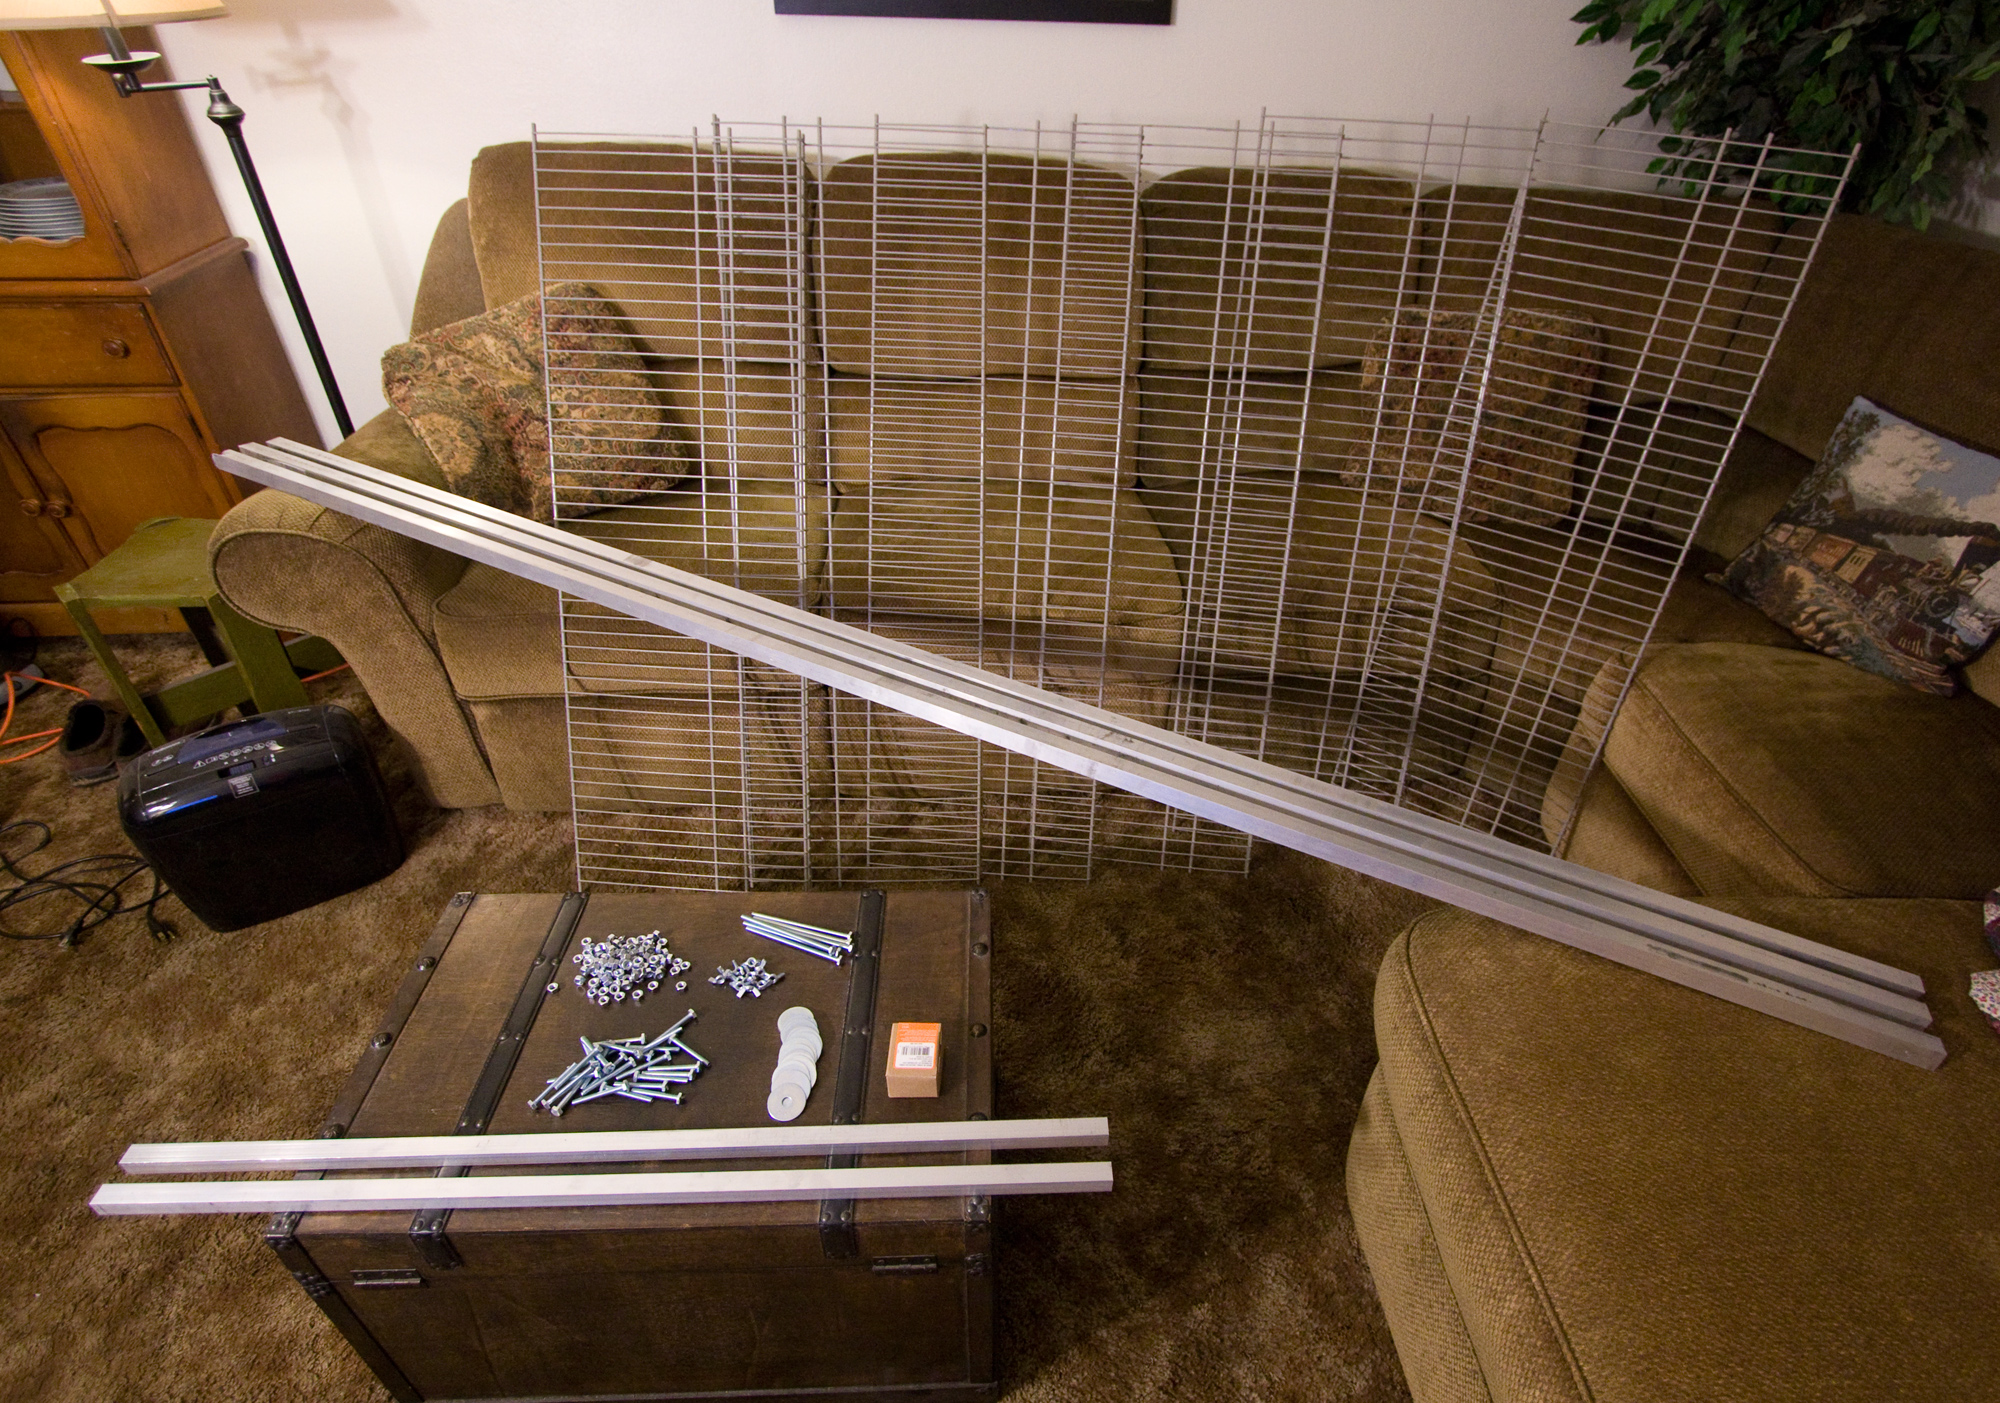
If you can weld, it's not terribly hard to fabricate something to serve as a hail guard. I don't have a sunroof, so I don't need that specifically. Being able to weld is a huge advantage with the kinds of mods we tend to make for chase vehicles. The PVC that Adam has is a great solution as well too.
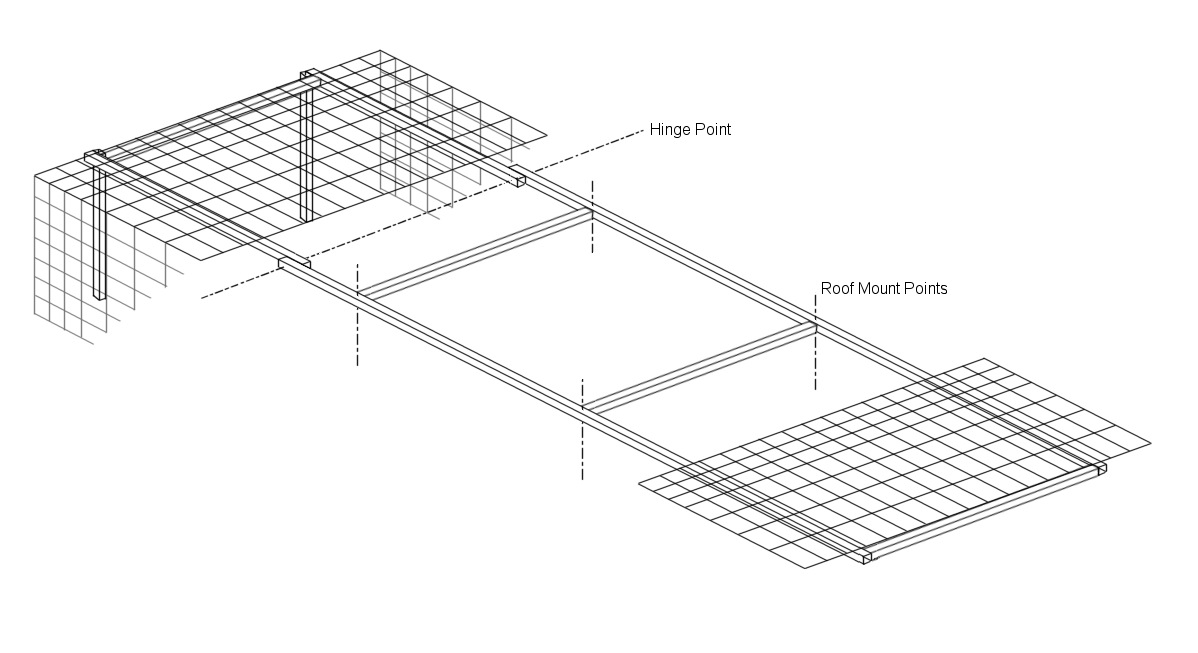
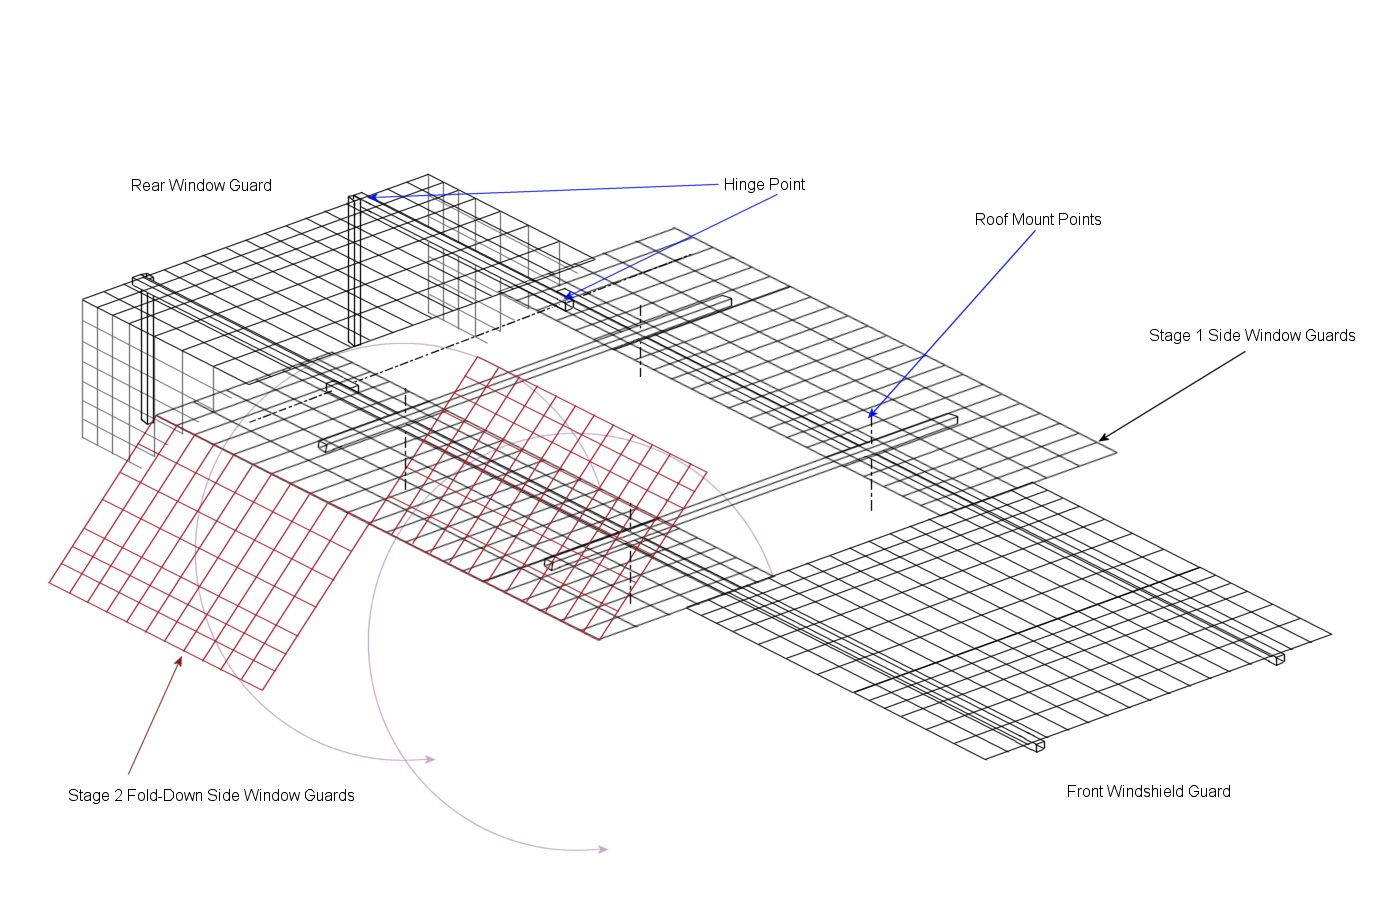
Dan, it probably would be fairly simple to fabricate a bracket that you could attach hinges to. Probably would not require any welding either. That would be the most simple solution, relatively speaking.
Dan, it probably would be fairly simple to fabricate a bracket that you could attach hinges to. Probably would not require any welding either. That would be the most simple solution, relatively speaking.