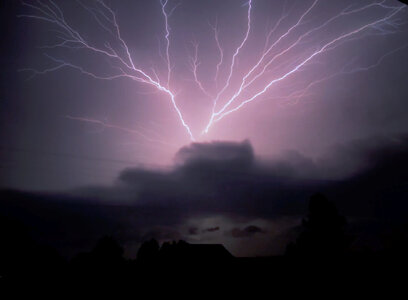
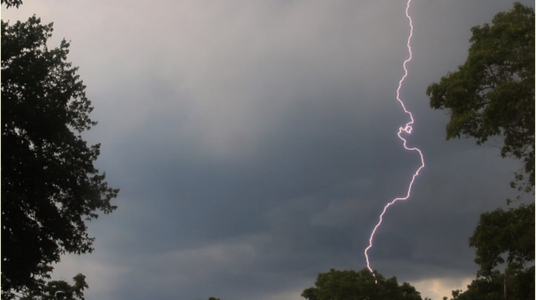
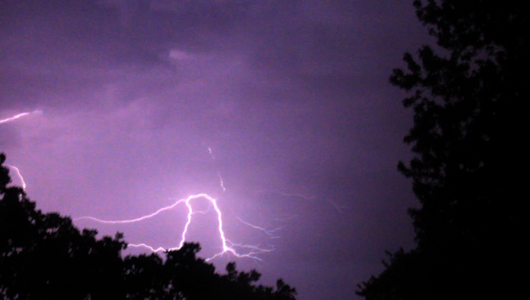
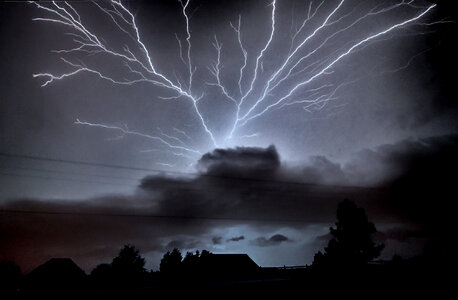
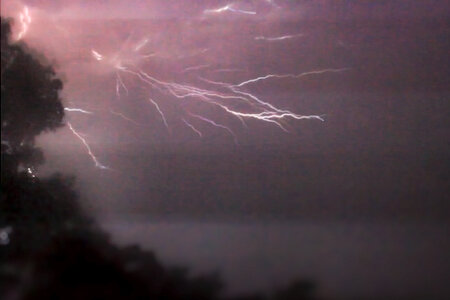
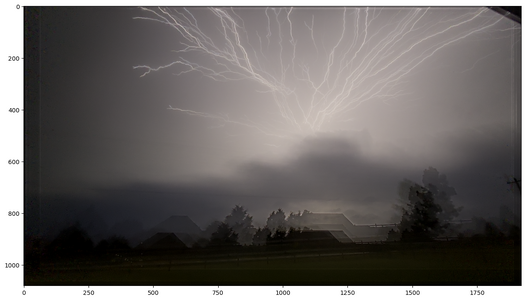
Can someone help tell me this type of lightning

Joined
Oct 20, 2023
Messages
31
I would really appreciate if someone could help me with the technical term for this type of lightning - I think its upward or reverse but not certain.
Also- I caught this on video and have about 6-8 frames. This is frame 2
I'd like any advice on how to salvage the quality, this is a screenshot.
Should I make a clip, can I export as a still frame? New to storm photography so feedback is welcome 😊
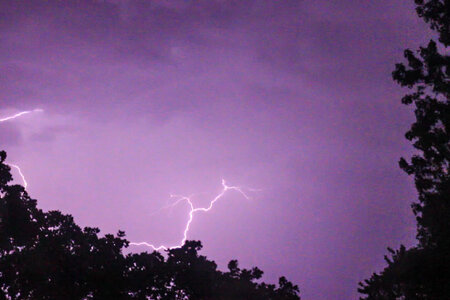
9F34A19D-FAF4-497C-9F55-A4AAB4D1B006.jpeg
 
I don’t think you can tell from this frame whether or not the lightning is an upward discharge. This could be a branch traveling toward the camera, which from the ground perspective could appear to be traveling upwards. Without seeing the main channel I can’t even be sure it isn’t a cloud-air discharge and you’re just seeing part of it.

As for further processing? I’ll let others advise you on how to pull the best quality out of the shot, since I don’t have much in the way of sophisticated software. Gimp of course, but that’s it. Other “poor man’s tricks” but I think they will fall short in this case.
 
It’s one end of a bidirectional leader. It looks like the negative end of an in-cloud flash, but could be one end (or the end of one branch) of many possible flash types extending out of view to the left (cloud to ground, upward, intracloud, etc). If you have the exact time and date, it might be possible to look up the event on the NLDN (lightning detection network) to see if it had any ground connections and their polarity.
 
OK so on the topic of making the most of your lightning video, I went through my cell phone to see if I had anything that might be useful. I found one that might serve: handheld from my backyard while I happened to be out in the yard, but that’s actually a good thing, because it is far from the ideal case. Watching an expert process pristine cases featuring great subject material and using top-of-the-line video equipment and software never taught me anything, because those resources are out of reach. You're getting the exact opposite of that, here.

Here’s the video clip: using an iPhone 15 with no tripod. It looks like I’m sitting in a dinghy on the ocean, there’s so much camera movement. Note: there is some cropping and the frame rate is cut in half for this movie file. (I know, I know: it's pretty hideous. But should also be a good test of our ability to make lemonade.)


View attachment CAdischargeM1 - SD 480p.mov

This is the process I used.
  1. Save frames you want to individual image files. In my case the only save option is to 8-bit JPEG, which is not great. The combination of 8-bit and JPEG format means blocky-artifacts (jaggies) and loss of sharpness, both in intensity and color. I kept 9 of 15 frames spanning the flash. One or two had no visible channel, and the rest were so bright the contrast between background and channel was hopelessly low.
  2. Next Start Gimp and select "Open as Layers".
    1. select the image files you want to merge and click "Open". Gimp will open each image and put it in its own layer. Each layer can now be processed individually.
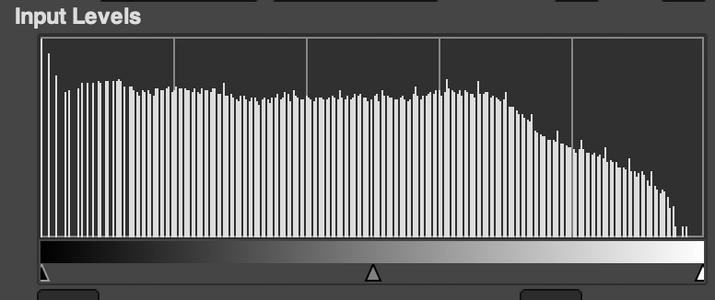
  3. Change the color resolution from 8-bit to 16-bit. The histogram of the levels in the image will now have holes (see No. 4 below), but we will be resizing the image and effectively filling in the holes in the histogram. Applies to all layers.
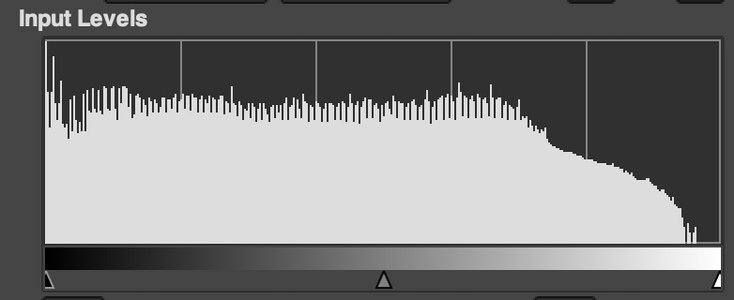
  4. Scale the image. Increase both the resolution (PPI) and the image size. I doubled both for this exercise. The images will be resampled (Gimp uses a cubic interpolation by default) and this process will smooth over some of the worst JPEG artifacts as well as filling in the levels histogram. This also applies to all layers.
  5. 1733160662904.png1733160686309.png
    Level Histogram after changing color resolution to 16-bit integer. The "missing levels" are obvious. This is a logarithmic plot showing just how flat is the distribution of levels in the iPhone video frame image.Level Histogram after resizing the image. The "missing levels" are now "filled-in". Not sure why the distribution is so flat.
  6. Now, for each image layer, adjust the levels to normalize the distribution of levels to be as similar as possible between layers. In this case just a few quick adjustments were made because the goal is just to illustrate the process. Generally the sequence was
    1. Brightness & Contrast: decrease brightness and increase contrast just a little
    2. Levels: adjust midtones slider but leave the endpoints alone
  7. Prepare to merge the visible layers. Adobe Creative Suite makes this a snap, but this is a low-budget operation, so we stick with Gimp. Note: The G’MIC plugin for Gimp makes the alignment and superposiiton of the layers much easier, but it’s not installed on the computer I used here.
  8. In a perfect world, you would simply add the layers but this blew out the area near the origin of the discharge. The following process is recommended in a number of YouTube videos, and it seemed to work OK here.
    1. Make all the layers invisible,
    2. then proceeding from the bottom layer to the top layer,
    3. make each one visible and,
    4. adjust the transparency so that each “adds” to the lower layers.
  9. Once you have the layer transparencies all set, pick “Merge Visible Layers”. You will now have a single image which hopefully looks OK.
  10. Sharpen the image to improve the visible channel. It seems counterintuitive to effectively blur the image by resizing in (3), only to sharpen it later, but everything gets easier at higher resolution: smoothing, sharpening, level adjustments--everything. We have hopefully removed enough of the visual artifacts in the original format so the sharpening makes an improvement. Note: the Gimp defaults will sharpen too much so I backed off to improve the visual quality of the lightning channel.
  11. Next adjust levels to taste. No hard and fast rule here.
  12. Adjusting the levels in (4) introduced some warmer tones so I adjusted the color temperature to correct for this. If I were to do it again I would adjust the color levels independently. Hopefully this color temerature adjustment would not be needed.
  13. Finally—rescale the image back to its original size. This is a matter of taste, of course, but the cubic interpolator Gimp uses actually works on any artifacts left over after all this “stuff” and generally improves the final result.


Here’s the result. After all this I’m not sure what to think. I’ll let you all decide. The tale grew in the telling—this was never intended to be so long.

CA_merged and Processed.jpg

Analogously to “It’s easier to edit than compose”, is the maxim “It’s easier to comment then to OP”. So if anyone has any suggestions based on their own experience and processing--PLEASE--that will certainly be appreciated.
 
Last edited:
Almost forgot--here's a cheat which will help you decide how much time to invest in a clip. The previous post was way too long, but just in case this is helpful….

I tried image stacking software normally used for astrophotography. If you don't set it to track comets or align on stars it simply stacks the images. Crude but effective. And fast.

On a Mac, StarStax is freeware that is easy to use and will give you a good preview of what's possible. For PC Deep Sky Stacker (DSS) is freeware that will probably do a good job as well--haven't tried it for lighting video frames. StarStax has limited options for combining frames but it only took, like, 10-15 minutes to get a stacked picture.

Here's what the frames I stacked looked like after processing with StarStax. Stayed with native 8-bit color resolution and image size, but did adjust levels a bit to bring out the lightning channel. I would not use this for a final image I cared about, but it's good for a preview.

StarStaX_CA1-CA9_average._prelim.jpg
 
Last edited:
Almost forgot--here's a cheat which will help you decide how much time to invest in a clip. The previous post was way too long, but just in case this is helpful….

I tried image stacking software normally used for astrophotography. If you don't set it to track comets or align on stars it simply stacks the images. Crude but effective. And fast.

On a Mac, StarStax is freeware that is easy to use and will give you a good preview of what's possible. For PC Deep Sky Stacker (DSS) is freeware that will probably do a good job as well--haven't tried it for lighting video frames. StarStax has limited options for combining frames but it only took, like, 10-15 minutes to get a stacked picture.

Here's what the frames I stacked looked like after processing with StarStax. Stayed with native 8-bit color resolution and image size, but did adjust levels a bit to bring out the lightning channel. I would not use this for a final image I cared about, but it's good for a preview.

I took the steps you recommended using Gimp instead of Photoshop, starting with a simpler series using 4 frames from a bolt.
I am quite satisfied with the results, and will be trying it out on the more complicated capture next! Thank you for your help.
 

Attachments

  • IMG_82601.png
    IMG_82601.png
    329.3 KB · Views: 15
Update- I forgot the "addition" step when merging the first image- so I will have to do that again.
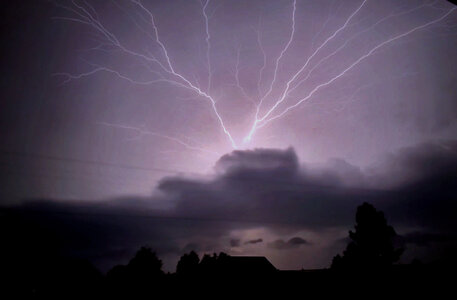
I did however with the original capture we were talking about, and wow- what a difference! There is still some cleaning up around the edges to do but I want to share the end product.
 

Attachments

  • 2024-08-08 170146.png
    2024-08-08 170146.png
    368.9 KB · Views: 12
Last edited:
Update- I forgot the "addition" step when merging the first image- so I will have to do that again.
I did however with the original capture we were talking about, and wow- what a difference! There is still some cleaning up around the edges to do but I want to share the end product.
I do hope you post your progress. Getting the most out of video captures of lightning without using professional editing software is a challenge that I really think forces you to think about the subject and the technology. I looked at some video tutorials that applied Lightroom and PhotoShop to high-res camera images and the results were great. What you would expect from high-tech hardware and software.

Last year I tried superimposing lightning pictures taken with my digital camera to see what it would look like. Using the Nikon Z6 at 30 sec exposures and simply summing three successive lightning flash images in Gimp gave a reasonable result with minimal adjustment of levels in the final flattened image. I was happy with the result, of course, but I think I Iearned more from struggling to superimpose shaky iPhone video frames. (Like--next time please use a tripod....)
 
Back
Top